Archive for the ‘Candy and Fudge’ Category

A Holiday Gift

Thursday, December 20th, 2012
Chef Deborah Snow, who created this brittle, loves her restaurant home, the warm and colorful Blue Heron.

Chef Deborah Snow, who created this brittle, loves her restaurant home, the warm and colorful Blue Heron.

My sister-in-law Leigh and I are busy making confections for holiday gifts and thought that this Funny Toilet Paper would make a unique and fun gift. We were looking for something slightly different from our usual penuche and decided on this recipe, which comes from Deborah Snow, the chef at the Blue Heron in Sunderland, Massachusetts.

I hadn’t made brittle in a couple of decades so it was lots of fun to make—and of course we HAD to taste a little before packaging the rest to give away.

Deborah makes her brittle look extremely elegant (see photo below). Ours was a little less gorgeous; we slightly overcooked the brittle so it didn’t spread very well. But it was utterly delicious.

Another time I think I would probably make the brittle with peanuts (less expensive than the nuts used here) or cashews (since they come already skinned!). The hazelnut-almond combination does work wonderfully for those unconcerned about budgets and schedules, however. The hazelnuts in particular pop beautifully.

For other gift-able confections (including fudge, chocolate-covered strawberries, and chocolate bark), try my blog’s “candy and fudge” category.

Happy/merry to you and yours…..

brittle for gifting web


Blue Heron Brittle


Ingredients:

1-1/2 cups sugar
1 cup water
3/4 cup light corn syrup
1 cup coarsely chopped toasted hazelnuts (for notes on toasting see this helpful page!)
1 cup coarsely chopped almonds (I used blanched slivered almonds)
2 tablespoons unsalted butter
1/2 teaspoon salt
1 teaspoon baking soda

Instructions:

Line a heavy large baking sheet with a silicone baking sheet.

Stir the sugar, water, and corn syrup in a heavy large saucepan over medium heat until the sugar dissolves. Increase the heat to high, and boil without stirring until a candy thermometer registers 260 degrees, about 20 minutes.

Reduce the heat to medium-low. Mix in the nuts, butter, and salt (the mixture will be thick and nutty), and cook until the thermometer registers 295 degrees, stirring constantly, about 15 minutes.

Quickly stir in the baking soda. (This makes the brittle easier to chew.)

Immediately pour the candy onto the prepared baking sheet, spreading it as thinly as possible. Let it stand until hard; then break the brittle into pieces.

Makes at least 7 to 8 cups of brittle.

Merry Christmas to all!

Merry Christmas to all!

Woof!

Thursday, February 10th, 2011

 
I was making chocolate bark on Tuesday for a couple of my long-distance Valentines when I realized that I had never posted my bark recipe on this blog. The omission HAD to be rectified! Chocolate bark is one of the easiest and most popular gift treats in my kitchen.
 
I was given the recipe by my neighbor in Hawley, Massachusetts, Philip Keenan. Phil is a selectman, a chef, and a builder—and he’s good at all three jobs. I made the bark a few years back on a Valentine’s Day broadcast on my local public-radio station.
 
In case you’d care to listen, here’s the link, courtesy of WFCR. (My favorite baritone, Don Freeman, and my favorite pianist, Alice Parker, joined me in the serenade at the end. I couldn’t let Valentine’s Day go by without a love song!)
 
Feel free to vary this recipe. Tiny jelly beans make nice filler at Easter, and crushed candy canes are Christmas-y, but the cranberries and almonds are my favorite add-in.
 
As I said on the broadcast, I recommend using the highest quality chocolate you can get. If you can’t handle three double boilers, just use two kinds of chocolate as I did in the picture below and on the radio.
 
Do not double the recipe unless you have two cookie sheets. I tried doing it on one sheet this week. Although I’m sure my Valentines won’t complain (well, I hope they won’t complain) I thought the layer of chocolate was too thick for optimal flavor and texture. 

Have fun!


Sweetheart Chocolate Bark 

Ingredients:
 
butter as needed
1/2 to 1 cup blanched almonds (according to your taste)
1/4 teaspoon salt
1/2 to 1 cup dried cranberries (again, to taste)
1/3 pound milk chocolate
1/3 pound dark chocolate
1/3 pound white chocolate
 
Instructions:
 
Butter a cookie sheet. Place the almonds on it, and toast them in a preheated 350-degree oven for 8 minutes. Toss the almonds around on the sheet, sprinkle the salt on them, and toast for an additional 2 minutes.
 
Remove the nuts from the oven, and put them on a paper towel to drain and cool. When they are cool, sprinkle them on a parchment- or silicone-covered cookie sheet. Sprinkle the cranberries on as well.
 
In each of three separate double-boiler pans (or their equivalent), boil an inch or two of water. While the water is coming to a boil, separately chop the milk, dark, and white chocolate into fairly uniform pieces. Place each chocolate in a pan on the top of one double boiler, turn off the heat below the boiled water, and stir the chocolates as they melt.
 
When the chocolates have melted, place alternating teaspoonsful of each on top of the cranberries and almonds. Swirl or splatter them together to make a pleasing pattern. Set the chocolate aside to cool and harden. (Do not refrigerate it.) This is best when eaten within 48 hours. 

Makes 16 large or 32 small pieces of bark.


If you enjoyed this post, please consider taking out an email subscription to my blog. Just click on the link below!

Subscribe to In Our Grandmothers’ Kitchens by Email.

Chocolate-Covered Strawberries

Wednesday, June 16th, 2010

strawberrychocweb


Like many sweet lovers in Franklin County, Massachusetts, I make a pilgrimage each year in June or early July to Richardson’s Candy Kitchen in Deerfield for chocolate-covered strawberries. The store indicates that the strawberries have arrived by setting a giant fake fork spearing an equally fake strawberry on the front lawn.  


The strawberries at Richardson’s are delectable. They feature a layer of filling between strawberry and chocolate that is particularly appealing. Of course, these treats have to be eaten within 24 hours—but my family never seems to have trouble with that rule!


The version below omits the filling since I have no idea how Richardson’s manages to put it inside the chocolate. The recipe merits making nonetheless. How can you go wrong with strawberries and chocolate? 


I apologize for the vagueness of the list of ingredients. Basically, one uses as much chocolate as one likes (or has). I had a lot so I used about 1-1/2 to 2 ounces per strawberry, which was definitely excessive. Since I only make these treats once a year I don’t mind a little excess. But you may definitely use less chocolate than I did.


I suggest using good chocolate rather than chocolate chips. The chips fit around the berries very well since they have extra ingredients that make them congeal. Plain chocolate tastes a little better, however. And if you use white chocolate, make sure it is indeed white chocolate and not some white “confection.”


Ingredients:


strawberries to taste (you really don’t need more than 1 or 2 per person)
chocolate to taste—milk, dark, white, or a combination


Instructions:


Gently rinse the strawberries and drain them thoroughly.


In the bottom of a double boiler boil an inch or two of water. If you don’t have a double boiler, use a wide shallow pan such as a frying pan. Find a heat-proof bowl or saucepan to put inside. (Obviously, if you are using more than one chocolate, you will need more than one double boiler and/or set of pans.)


While the water is coming to a boil, chop the chocolate into small fairly uniform pieces. Turn off the heat below the water, and place the chocolate in a pan or bowl on top. Stir the chocolate as it melts over the hot water.


When the chocolate has melted, remove it from the water, carefully wiping the outside of its bowl or pan. Let it cool for a few moments so that it won’t make your strawberries go bad before you get a chance to eat them!


Carefully dip each strawberry in the chocolate, holding it by the hull. Place the covered strawberries on a silicon- or wax-paper-covered plate to cool. As soon as they are at room temperature either eat them or pop them into a covered container to cool in the refrigerator until you are ready to eat them.


Enjoy within 24 hours.


strawberriesweb

If you enjoyed this post, please consider taking out an email subscription to my blog. Just click on the link below!

Subscribe to In Our Grandmothers’ Kitchens by Email.

Ballpark Food III: Cracker Jack

Wednesday, May 12th, 2010

 
Today’s tribute to baseball food falls on the 85th birthday of Yogi Berra, the colorful player and manager whose propensity for malapropisms has made him the Sam Goldwyn of Baseball.
 
My favorite, of course, is food related: “When you come to a fork in the road, take it.” Happy Birthday, Mr. Berra!
 
As a chanteuse I can’t do a series on ballpark food without alluding to baseball’s signature song, the 1908 hit “Take Me Out to the Ball Game.”
 
Buy me some peanuts and Cracker Jack,
I don’t care if I never get back.
 
Historians make much of the fact that neither the lyricist, Jack Norworth, nor the composer, Albert Von Tilzer, had ever attended a baseball game when they came up with the song.
 
I’ve never seen a professional baseball game in person, but I still understand the place of the sport in American culture—and clearly so did Norworth and Von Tilzer.
 

Nowadays few Americans recall that the song has verses. Here they are as they appeared in the 1908 sheet music (along with the more famous chorus, of course!) in an early Edison cylinder recording.

 
Cracker Jack predated the song and this recording, making its mass-market debut in 1893 at the World’s Columbian Exposition in Chicago. (It was then called “Candied Popcorn and Peanuts,” not receiving its name for a few more years.)
 
I love caramel corn—and CJ is nothing but caramel corn with a hint of molasses.
 
I’m afraid you’ll have to provide your own prizes……..


Ingredients:
 
2 quarts freshly popped popcorn
1 cup roasted shelled peanuts
3 tablespoons butter
1/2 cup brown sugar, VERY firmly packed
5 tablespoons light corn syrup
1 generous tablespoon molasses
1/4 teaspoon salt
 
Instructions:
 
Preheat the oven to 250 degrees. Mix together the popcorn and peanuts and place them on a large jelly-roll pan (a cookie sheet with sides) in the preheated oven.
 
In a small saucepan combine the remaining ingredients. Over medium heat, bring the mixture to a boil, stirring. Cook, stirring frequently, until the liquid reaches about 260 degrees. It should form a definite but pliable ball when inserted into cold water.
 
Remove the popcorn and peanuts from the oven. Quickly but gently pour the caramel mixture over them and stir. Return the pan to the oven.

Cook for 45 minutes, stirring every 15 minutes and making sure that all of the solid material is covered with the coating. If it starts to stick to the pan earlier, remove it from the oven; you’re aiming for Cracker Jack, not peanut/popcorn brittle!
 
When you remove the pan from the oven, transfer the Cracker Jack to sheets covered with waxed paper to cool. Store in an airtight container.
 
Makes about 2 quarts of candy-coated popcorn with peanuts. Don’t forget to add a prize or two!
 

This 1907 Cracker Jack postcard featured President Teddy Roosevelt (Courtesy of Yellowstone National Park)

If you enjoyed this post, please consider taking out an email subscription to my blog. Just click on the link below!

Subscribe to In Our Grandmothers’ Kitchens by Email.

Matzo Mania

Monday, March 29th, 2010

 
Passover begins tonight. This eight-day holiday means many things to many people: the survival of the Jewish people in the book of Exodus, the overall history of Judaism, and even the last supper of Jesus.
 
For me, it’s a time to remember my Jewish relatives–particularly my grandparents, whom we always joined for Passover when I was a child.
 
As a food writer, I appreciate the way the whole holiday is structured around food. Each thing eaten at the Seder has its own meaning. In addition, the practice of eating no bread other than unleavened matzo during Passover commemorates the departure of the Jews from Egypt. Their bread didn’t have time to rise.
 
It is also a sort of penance. Eating matzo, pretty much the plainest of breads imaginable, reminds Jews of the trials of their forebears.
 
My grandmother served matzo without much adornment during Passover, occasionally sprucing it up with a little whipped cream cheese for breakfast or lunch.
 
Despite this tradition, I’m always tickled by the idea of getting a little fancier with matzo.
 
This year I have made two simple “matzo plus” dishes I’d like to share with you.
 
The first is Matzo Pizza. I got this idea from the website Kosher.com. Kosher.com’s resident chef, Jamie Geller, created a tasty standard pizza with her matzo—vegetables, cheese, tomato sauce.
 
I’m not such a fan of tomato-based pizza that I can’t wait eight days to have it. I do love asparagus, however. I’m a sucker for the asparagus pizza served in spring at the Green Emporium in Colrain, Massachusetts.
 
That pizza inspired this one. Matzo will never replace yeast crusts in my kitchen year round, but during Passover (or when one is in a hurry) it makes an acceptable, crispy platform for cheese and vegetables.
 
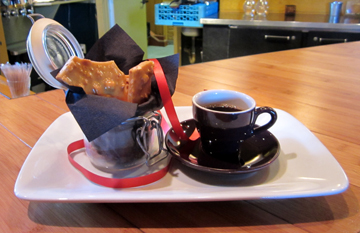
My second recipe today is a treat I’ve enjoyed for years when made by other people, Matzo Crunch. (Beware: many call it Matzo Crack because of its highly addictive properties!)
 
Marcy Goldman of BetterBaking.com invented this confection, which I have adapted a little. I have seen it covered with nuts (pressed into the chocolate when you sprinkle the optional salt). My friend Lark Fleury even makes it during other times of year with saltine crackers.
 
Marcy maintains that you can make the crunch with margarine if you keep kosher and want to eat it with meat. I think the butter adds so much flavor that I would advise you NOT to try the margarine. Just don’t eat the crunch with a meat meal!
 
Whenever and however you make it, I advise you to make sure that you have lots of people to whom you can give the crunch. It really is addictive—and very, very rich. I love to make it—and I love to get it out of the house FAST.
 
Happy Passover……


Springtime Matzo Pizza

 
Ingredients:
 
10 thin asparagus spears, trimmed and cut into 1-1/2-inch pieces
a splash of extra-virgin olive oil
3 basil leaves, torn into pieces
a sprinkle of red pepper flakes
1 teaspoon lemon zest
1/2 cup pitted ripe olives, cut into small rings
1/3 cup feta cheese, crumbled
1-1/2 matzos (the whole matzo should be halved for easier serving so that you have three halves)
3/4 cup mozzarella cheese, shredded
 
Instructions:
 
Preheat the oven to 375 degrees. Line a cookie sheet with aluminum foil, and lightly oil the foil.
 
Sauté the asparagus in the olive oil for 5 minutes. Remove from heat.
 
Stir in the basil, red pepper flakes, and lemon zest; then toss in the ripe olives and feta.
 
Place the three halves of matzo on the prepared cookie sheet, making sure that they fit together as well as possible. Sprinkle most of the mozzarella cheese on top of the matzo.
 
Spread the asparagus mixture over the cheese, and top with a little more mozzarella. Bake for 10 minutes, or until the cheese melts nicely.
 

Serves 1 for dinner or 2 to 3 for lunch.


Ingredients:
 
6 pieces matzo, broken into several strips each
1 cup (2 sticks) unsalted butter
1 cup firmly packed brown sugar
1/2 teaspoon vanilla
1-1/2 cups chocolate chips (semi-sweet, white, or some of each—even milk if you like, and I like)
coarse sea salt for sprinkling (optional but yummy)
 
Instructions:
 
Preheat the oven to 350 degrees. Line 2 cookie sheets with aluminum foil, and place parchment paper or silicone mats over the foil. Place the pieces of matzo on top.
 
In a medium saucepan combine the butter and brown sugar. Bring them to a boil, stirring constantly. Boil for 3 minutes. Remove the mixture from the heat and stir in the vanilla.
 
Spoon the sugar mixture over the matzo, spreading it with a spatula to cover the matzo as well as you can. Bake for 15 minutes.
 
Remove the matzo from the oven and sprinkle the chocolate chips on top. After 5 minutes, spread the chocolate with a knife. Sprinkle a little sea salt on top if you wish for additional crunch and flavor.
 

Allow the crunch to cool; then break it into more pieces. Makes about 40 small pieces. Don’t forget to give most of them away!


If you enjoyed this post, please consider taking out an email subscription to my blog. Just click on the link below!

Subscribe to In Our Grandmothers’ Kitchens by Email.