Archive for the ‘Condiments’ Category

A Salsa for Cinco

Wednesday, May 3rd, 2023

I have been celebrating Cinco de Mayo since I was in graduate school in Texas. This holiday commemorates the Mexican victory over French forces at the Battle of Puebla on May 5, 1862.

The day is actually more significant culturally here in the United States than it is in most of Mexico. Over the years, it has come to represent a time for celebrating Mexican heritage (and of course Mexican food) in this country.

For some Americans, Cinco de Mayo is primarily a drinking holiday. I’m not much of a drinker, but I am an eater. I like to prepare something Mexican or Tex-Mex on May 5. Sometimes I’m moved to make enchiladas. Other times I’ll just throw together a little guacamole.

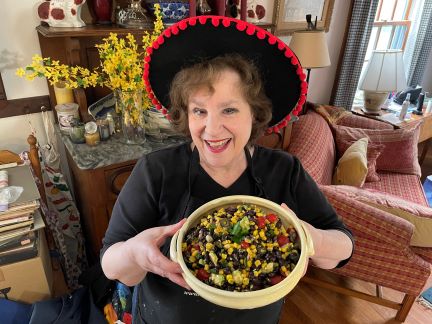
This year I’m putting together a salsa based on a recipe from my cousin Mardi. I like to serve it as a sort of salad or side dish; it is satisfying with or without tortilla chips.

The term salsa, as readers may know, means sauce in Spanish. The Aztecs and the Mayans began preparing a type of salsa millennia ago. Their version apparently contained tomatoes, chiles, beans, and squash. The Spanish conquistadores took note of this tasty condiment in the 1500s and gave it its name.

Salsa was not part of mainstream U.S. culture until the mid- to late 20th century. In the 1940s, former college football star David Pace and his wife Margaret opened the first salsa manufacturing plant in Paris, Texas, making what Pace called “picante sauce.” (The Pace company’s salsa is still called this and is still popular.)

I think I would have liked David Pace, who died in 1993 at the age of 79. According to his obituary in “The New York Times,” he was known for more than his picante sauce business, which was sold to Campbell’s after his death for more than $1 billion.

“Mr. Pace also patented an executive chair in 1967 that could be opened flat for taking a nap,” the obituary noted.

My father, who insisted on installing a couch in his office in Rockefeller Center so that he could sleep for a few minutes every afternoon, would have approved. So do I; I have been known to take a cat nap myself.

In the latter part of the 20th century, Mexican foods and salsa in particular found their way into mainstream American cuisine. By the 1980s, salsa was available pretty much everywhere in this country, and in 1991 it surpassed stalwart catsup as Americans’ favorite condiment.

In 1998, it was deemed a vegetable by the U.S. Department of Agriculture so that it could be classified thus in school-lunch programs.

There is much to love in salsa. It’s generally healthy and low in fat yet high in flavor. Unlike ketchup, it is made up of identifiable foods and contains little or no sugar. It’s vegan and tastes fresh even when (as in the salsa below) most of the ingredients come from a can or the freezer.

It is also easy to make at home and infinitely variable. When I think of salsa, tomato comes to mind first and foremost. Nevertheless, I have made salsa by adding cilantro, lime juice, onion, and salt to many different fruits: strawberries, blueberries, peaches, mangoes, and pineapples.

Mardi’s salsa adds a little protein to the mix by mixing in black beans. This type of salsa is often known as confetti salsa. It’s made up of small, discreet, colorful ingredients, just like confetti.

If you try it at home—and I encourage you to do so—think about adding flavors you like or have in the house. Some people throw in part or all of a can of green chiles. Some use a fresh jalapeño or some hot sauce for heat instead of the chipotle. Some eliminate the olives and add more beans. You can’t really go wrong.

One warning: This is the sort of recipe that absolutely depends on individual taste. I started with the amounts I mention in the formula below and then ended up adding quite a bit more cumin, chipotle, and lime juice.

The end product was spicy and citrussy and fabulous. I know not everyone likes spice, however. To employ a phrase I generally dislike but find appropriate when it refers to flavor, “you do you.”

If you don’t get around to making this dish until after May 5, never fear. All of May is National Salsa Month, so designated in 1997 to honor the 50th anniversary of Pace Picante Sauce.

Confetti Salsa

I find that the best way to chop herbs like the cilantro here is to wash and dry them, then place them in a sturdy, narrow container like a juice glass and cut them with clean kitchen shears.

Ingredients:

1 can (15.5 ounces) black beans, rinsed and drained
1-1/2 cups corn kernels (In summer these would be fresh; at this time of year I put frozen kernels in a colander and let them defrost and drain.)
1 4-ounce can pitted ripe olives, drained and cut into little rounds (If all you can find is a 6-ounce can, either save some olives for another occasion or go ahead and use the whole can.)
at least 25 grape or cherry tomatoes, halved
1 very small red onion, or part of a larger one, diced
1 handful cilantro, chopped
1-1/2 teaspoons salt
dried chipotle chile powder (Start with 1/4 teaspoon.)
cumin seeds, or ground cumin if that is all you have (Start with 2 teaspoons.)
the juice of 1 to 2 limes (Start with 1 and then add more as needed; I used 1-1/2 most recently.)
1 splash olive oil, plus more as needed
1 avocado, cut into chunks

Instructions:

In a medium bowl, combine the beans, corn, olives, tomatoes, onion pieces, and cilantro. Mix well. Sprinkle the salt, chipotle, and cumin seed on top; then blend in the lime juice and the olive oil. Try the salsa and add more chipotle, cumin, oil, and lime juice to taste.

If you’re eating the salsa soon after you make it, add the avocado chunks along with the other vegetables and fruits. Otherwise, refrigerate the salsa until you’re ready to serve it, and then stir in the avocado. That method avoids discoloration of this delicate fruit.

Serves 4 to 6 as a salad or a small party as a dip.

In a Pickle with a New Book!

Sunday, September 18th, 2022


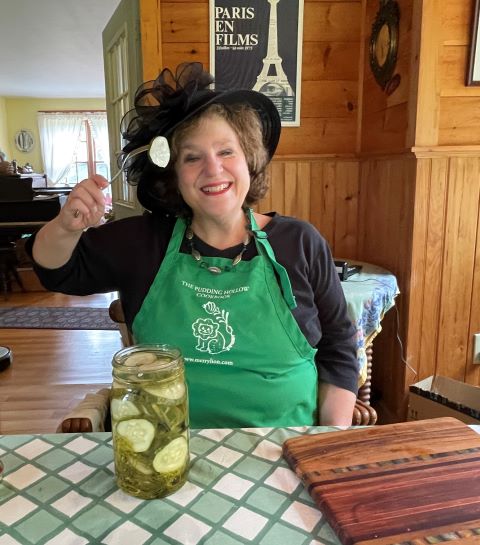
I’m not really in too much of a pickle. I just love that title. But I am anxious to share a recipe from my new book, Pot Luck: Random Acts of Cooking, which will be released on Sunday, October 2.

The tiny pickle I’m in is that I have been so busy getting ready for the book launch—and plugging away at my many part-time jobs—that I haven’t had time to put away much produce this summer.

I have made a grand total of 1-1/2 cups of jam! And until recently I had made zero pickles. I didn’t have the time or the patience to make actual processed pickles.

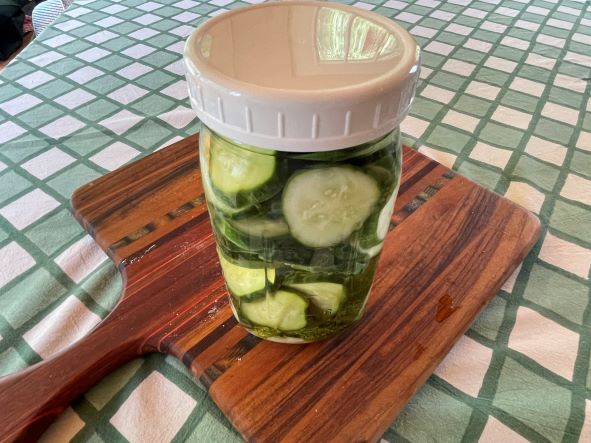
Fortunately, I can always throw together a jar of refrigerator pickles, and I did. I was introduced to these quick-to-assemble savory treats years ago by Ivy Palmer, who ran the Shelburne Falls Farmers Market. Refrigerator pickles don’t last for months on end the way regular pickles do. They do offer genuine pickle flavor … and nearly instant gratification.

Many of the pickle recipes in my repertoire require the cook and her/his family to wait six weeks or more to break into a jar of pickles. In contrast, if made with small bits of produce, refrigerator pickles may be eaten in three days. That’s about as instant as gratification can get in the pickle world.

I generally make dill refrigerator pickles with cucumber. As fall advances, however, I’m considering expanding my repertoire to include carrots and cauliflower … maybe even Brussels sprouts. As long as I cut them into small pieces, these veggies should lend themselves nicely to quick pickling.

Readers who are busy canning right now: I salute you! The recipe below is for those who, like me, aren’t going to get around to canning their own pickles this season. You don’t even have to have a garden to make these. My cucumbers came from Butynski Farm in Greenfield. I looked for firm, deep-green pickling cukes there. Cucumbers that have started to turn yellow or white make less crunchy pickles.

I even purchased my dill at Butynski’s because the dill in my herb garden had wilted in this summer’s dry heat. And my cider vinegar came from Apex Orchards in Shelburne.

Enjoy your pickles. And if you enjoy this blog, please consider supporting me by ordering Pot Luck. A list of my upcoming appearances may be found on my website. The book will also be available near me at Apex Orchards, Boswell’s Books, the Historic Deerfield Museum Store, and the World Eye Bookshop—and a little farther afield at the Toadstool Bookshop in Keene and the Williams Bookstore in Williamstown.

You may also order it from my website. It is available on Amazon.com as well, but it’s a little more expensive there.

Happy reading … and happy eating!

Refrigerator Dill Pickles

Ingredients:

3 to 5 pickling cucumbers (depending on size)
3 tablespoons pickling salt, sea salt, or kosher salt (but not iodized table salt)
1 cup cider vinegar
1 cup water
1 head dill plus as many dill leaves as you like
1 clove garlic
3 black peppercorns

Instructions:

Cut your cucumbers into spears or slices, as desired. I prefer slices; they are easiest to stuff into a jar. Left whole, the cucumbers will take a long time to pickle in the fridge so cutting in some fashion is a must.

To increase the crunchiness, place the cut cucumbers in layers in a colander over the sink. Sprinkle each later with salt—about 2 tablespoons total—and let them sit for 2 hours. This drains out much of the water in the cucumbers. Rinse them, place them in a clean dishcloth, and gently squeeze out the excess moisture.

Prepare a quart jar with a lid by running it through the dishwasher or washing it in very hot, soapy water and letting it air dry. Any jar with a lid will do; the wider the opening, the easier your work will be.

Place the dill in the bottom of your jar, peel and lightly crush the garlic clove, and drop it in along with the peppercorns. Put in the cut cucumbers. If you have leftover pieces of salted cucumber, use them in a salad or a sandwich.

Mix the remaining tablespoon of salt, the vinegar, and the water in a saucepan, and bring them to a boil. Let the mixture cool for a few minutes; then pour it over the cucumbers, filling the jar right to the top.

The pickles will be ready to eat in three days and should be eaten within a month. (I have been known to stretch them out for more than a month.) Makes 1 quart.

Watch me make them!

Strawberry Salsa

Friday, June 30th, 2017

Rhubarb has just about gone by in my neck of the woods so I am in deepest mourning. Fortunately, strawberries have arrived to take my mind off my grief.

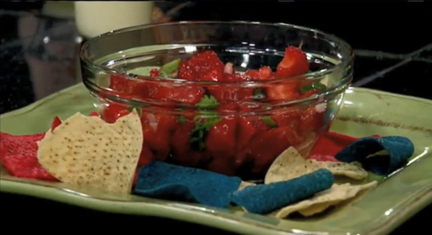
I had never made strawberry salsa before trying it this season—but I’m glad to have it in my repertoire. I love salsa, and I hate waiting for tomato season to make it! This version is easy to put together, looks spectacular, and tastes fabulous.

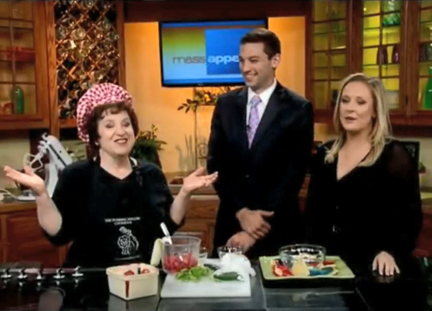
Naturally, I made it this week on Mass Appeal and discussed the reasons for seeking out strawberries here and now. They make the perfect Fourth of July treat in New England.

Both hosts on the show called themselves “salsa purists” (particularly Danny New, who recently arrived in our state from Florida) and were skeptical about strawberry salsa. This condiment won them over, however.

Convincing the Skeptics

The Salsa

Ingredients:

the juice of 1 lime
1/2 teaspoon salt (more or less, to taste)
1 jalapeño pepper, seeded and finely chopped
3 to 4 tablespoons finely chopped red onion
a handful of fresh cilantro, chopped
2 cups strawberries, chopped fairly small

Instructions:

In a bowl stir together the lime juice and the salt. Stir in the pepper, the onion, and the cilantro; then add the strawberries.

Refrigerate the salsa for a couple of hours for maximum flavor. Serve with tortilla chips, over chicken or fish, or with crackers and cream cheese. Makes a little over 2 cups.

And now the video:

Tinky Makes Strawberry Salsa on Mass Appeal

Hot Sauce!

Tuesday, April 11th, 2017

Unless otherwise noted, photos come courtesy of Kitchen Garden Farm

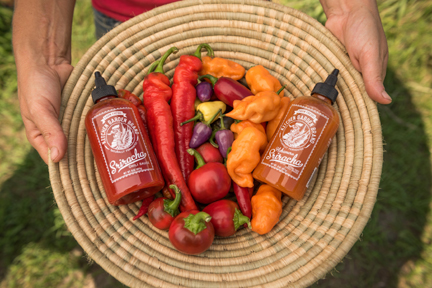
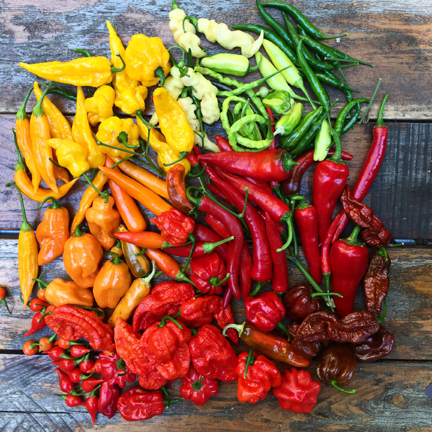
“We’ve always loved growing hot peppers,” Caroline Pam of Kitchen Garden Farm in Sunderland, Massachusetts, told me recently. “Hot peppers are essential to many cuisines around the world. They come in so many colors and flavors and heat levels that they are really fun to grow.”

In 2013, she and her husband/business partner Tim Wilcox decided to try making something different with the peppers from their organic farm. Each September they organize a spice lovers’ weekend called Chilifest. That year they added a new feature to Chilifest: their own Sriracha.

Caroline and Tim, courtesy of Jim Gipe/Pivot Media

Originating in Thailand, Sriracha is a chili sauce that has taken the country by storm in the last couple of decades. Kitchen Garden’s version is special, Caroline Pam informed me. “It has a completely different flavor when it’s made from peppers that are fresh and are fermented the way we do them,” she explained.

She is far from alone in seeing the merits of the farm’s Sriracha. In late January Kitchen Garden’s sauce won a coveted Good Food Award in the “pantry” category.

According to spokesperson Jessica Zischke, the Good Food Award program is “a national initiative to honor American craft food and drink producers for excellence in both taste and sustainability.”

“We seek to highlight businesses in all parts of the U.S. who are making products that are tasty, authentic, and responsible,” Jessica told me. This past year 2059 entries were submitted from 38 states. Only 291 products received awards.

“I hadn’t thought to enter it,” Caroline Pam said of the program. “I got an email from one of the pantry judges who wrote to me out of the blue and said, ‘I think you should enter your product.’

“We had to submit our unmarked samples in September, which for us was a little crazy! It was our first bottling day [of the year for the Sriracha], and I think it was the day before Chilifest.”

I asked about the process of making the sauce. During the harvest season, Caroline told me, the farm picks 3000 pounds of peppers each week. “We fill up our box truck with hand-picked peppers,” she explained.

The peppers are taken to the Western Massachusetts Food Processing Center in Greenfield. The next day, they are washed, stemmed, and ground. The peppers then go through two stages of fermentation, a process that takes weeks.

Eventually, the pepper mixture is cooked and milled; then the pepper pulp is heated with vinegar, bottled, and sealed. The Sriracha—like the salsa Kitchen Garden Farm also produces—is shelf stable but must be refrigerated after opening.

In their first year of Sriracha production, Caroline and Tim put up 400 bottles. The following year (2014) they ended up with 4000 bottles. Their haul for this past year was 32,000 bottles from 18,000 pounds of peppers.

The sauce is sold in stores and is also available from the Kitchen Garden website, www.kitchengardenfarm.com. It is popular in restaurants throughout the northeast. “It’s fun to see how people are using it,” said Caroline.

She and her husband stagger the production of the sauce through the fall and early winter months. Picking can take place only in the warmer months, but bottling ended in the winter.

At this time of year the two farmers are still harvesting; they produce hardy greens and root vegetables in their high-tunnel greenhouses. They are also busy planning for the coming season.

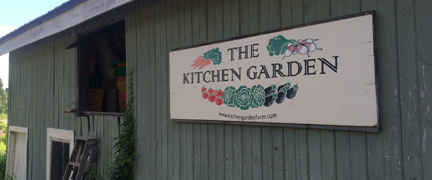
Kitchen Garden was founded in 2006 “with just one acre and a rototiller,” Caroline told me. The 2017 season will be the first in which their now 50-acre farm will operate exclusively on a wholesale basis. Caroline noted that she will miss seeing customers at farmer’s markets.

“It was a really hard choice, but we’re responding to what the farming opportunities are,” she said.

Consumers will still be able to find Kitchen Garden’s range of organic produce at local markets. And the farmers will be on hand for this year’s Chilifest, scheduled for September 16 and 17.

Caroline Pam and Tim Wilcox are both passionate cooks. In fact, Caroline attended culinary school in New York City. The two use their Sriracha in a variety of dishes.
“It complements everything else that we’re growing. It’s really just so good with everything you can cook,” Caroline enthused.

I asked her for a recipe that involves the Sriracha—and she shared the noodle formula below.

“In my first apartment, when I was 18 years old, a vegetarian, and new to cooking, I made this at least twice a week,” she said. “The recipe has evolved somewhat since then, but the basic concept is the same: noodles, peanut sauce, fried tofu, and raw vegetables.

“Always fills you up. Never lets you down. And it just so happens to be the perfect vehicle for our Sriracha.”

Caroline was kind enough to send me all three types of Sriracha so I could test the recipe with my family. The classic Sriracha was our favorite—just enough heat to lend kick to the noodles. The habañero flavor was quite a bit hotter—and the VERY hot ghost pepper version offered initial sweetness followed by a little burn. I have no doubt we’ll manage to finish all three eventually!

We changed the recipe a bit to suit what we had in the house, blanching asparagus instead of broccoli and substituting leftover chicken for the tofu. (Some form of egg might also be nice.) I will definitely make this recipe again; I love peanut sauce.

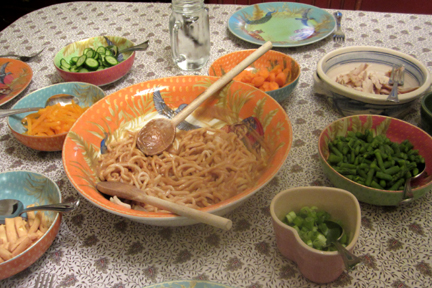
Here’s what our spread looked like.

Caroline Pam’s Peanut Noodle Bowls

Ingredients:

for the main event:

1 pound pasta: whole wheat spaghetti, buckwheat soba, or udon noodles
sesame oil as needed

for the peanut sauce:

2/3 cup natural peanut butter
1/4 cup tahini sesame paste
2 cloves garlic, minced
2 fresh Thai chilies, minced, or 1 teaspoon cayenne
3 tablespoons soy sauce, or 2 tablespoons soy and a heaping spoonful of miso paste
2 tablespoons sugar
2 tablespoons sesame oil
1/2 to 1 cup hot water, to thin the sauce

for the fried tofu:

1 block firm or extra-firm tofu (1 14-ounce package, drained)
1/2 cup tamari soy sauce
4 tablespoons canola or other neutral vegetable oil

for garnish (use any combination of these):

blanched broccoli florets
shredded cabbage
shredded carrots
sliced radishes
sliced cucumber
chopped scallions
chopped cilantro

for the final touch:

Kitchen Garden Farm Sriracha, drizzled to taste, based on heat tolerance (start with 1 to 2 tablespoons per person)

Instructions:

Boil the pasta until it is al dente; then drain and rinse it in cold water to stop the cooking. Toss it with a little sesame oil and set it aside.

In a medium-sized bowl, mix together the sauce ingredients, adding hot water as necessary to achieve the texture of thick and creamy salad dressing.

For the fried tofu, cut the tofu into thin (1/4-inch) slices. Put the soy sauce in a small shallow bowl or saucer. Dip the slices on each side briefly and fry them in hot oil until crispy, turning once, as you would fry bacon. Drain on paper towels and chop coarsely into bite-sized pieces. Put the tofu in a serving dish on the table.

Toss the sauce with the noodles and serve each portion in a large bowl. (Sometimes a little extra hot water will help the sauce spread over the noodles.)

Prepare the rest of the vegetables and herbs and arrange them artfully on the table so that diners can serve themselves. Lubricate with Sriracha as needed. Serves 4 to 6.

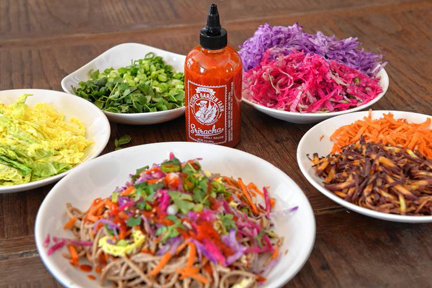
Here is Caroline’s version of the dish. Note that she julienned her veggies to make everything even and gorgeous.

Humble Mustard

Friday, July 15th, 2016

mustardweb

I use condiments year round—but the summer grilling season in particular seems to cry out for them, particularly when I am the griller in charge. My grilling skills are definitely under par, and a little distraction can help.

I have never mastered ketchup—and anyway it’s too early in the season to try making it (we are only just starting to find tomatoes in western Massachusetts).

Mustard is another matter. I love it, and I make it often.

As I have written here before, I love to give fancy, rich mustard as a holiday gift. At this time of year, however, I go for a simpler mustard.

I made it last week on Mass Appeal and want to share the recipe with you.

If you don’t like your mustard with kick, cut down on the dry mustard or add more honey. For me, the formula below is pretty perfect.

must2web

Homemade Mustard

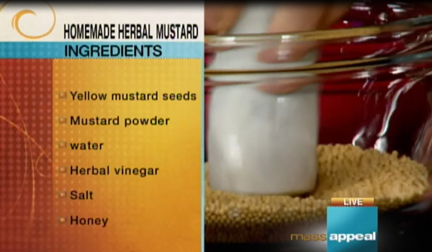
Ingredients:

1/2 cup yellow mustard seeds
2 tablespoons mustard powder
1/2 cup water
1/3 cup tarragon vinegar (or use another herb to make your vinegar)
1-1/2 teaspoons salt
2 tablespoons honey

Instructions:

Place the mustard seeds in a stainless-steel bowl. Briefly go at them with a pestle if you have one to release some of the oils. Add the mustard powder, and stir in the water. Let the mustard sit for 10 minutes.

At the end of the 10 minutes pour in the vinegar. Cover the mixture and let it sit overnight.

The next day, place the mixture in a blender. Add the salt and honey. Pulse quickly to blend, but try to leave some bits of mustard coarse.

Pour the mustard into a clean glass jar, cover, and refrigerate for 1 week before using. Makes about 1-1/4 cups.

Here is the video:

[embedyt] http://www.youtube.com/watch?v=MEoovoKNaY4[/embedyt]