
If I were a truly famous food writer (as my nephew Michael, bless his heart, believes I am), I would probably meet people who read my blog all the time. I’m not and I don’t.
Monday evening, however, I ran into a reader.
I was walking to the music rehearsal for my local singing group. On Sunday, I did my solo concert, “What the World Needs Now,” and now I am rehearsing with the rest of the gang for our annual Saint Patrick’s Day extravaganza.
A woman stopped me and said, “You’re Tinky, aren’t you?”
I admitted that I was indeed Tinky.
“I have been enjoying reading your blog,” she informed me. “But you know, the blog still thinks it’s Christmas.”
She had a point. I have cooked over the past month or so. I have not posted here, however. Some months are just a bit frantic.
To give you (and the woman, whose name I should really have asked for) something to read until my life settles down, I’m sharing a recipe I made recently at my seasonal job at Williams-Sonoma.
I was teaching a kids’ class on no-bake Valentine desserts. The store had a recipe we HAD to use—and it was actually very good. We started by making the Chocolate Rocket, from Jennifer Tyler Lee’s cookbook The 52 New Foods Challenge.
This pudding used avocado for the majority of its fat. It was lovely and dark and chocolaty. (If you’d like to try that recipe, you may find it here. Lee didn’t say whether one should pack the brown sugar so I packed it lightly, and the result was delightful. Even the kids who didn’t think they liked avocado enjoyed it.)
Next, we made a little chocolate bark. (I had some made up in advance so the kids didn’t have to wait for theirs to cool.)
For our last creation, the chef in charge of classes at Williams-Sonoma suggested that the kids and I make a chocolate mousse. There was just one problem. Chocolate mousse usually takes at least a couple of hours to chill—and the class only lasted for an hour.
So I cheated and made chocolate chantilly. Chantilly, for those of you not in the know, is what the French call whipped cream. The chocolate rocket was definitely healthier—but this was decadent and delicious. And I did explain that a little of it goes a long way.
Here’s the recipe in case you’d like a quick faux mousse of your own for Valentine’s Day.

Chocolate Chantilly with Raspberries
Ingredients:
2 cups heavy cream
6 ounces 70-percent dark chocolate, finely chopped
1/2 cup sugar
1 teaspoon vanilla
raspberries as needed (1 to 2 pints)
plain whipped cream for garnish (optional)
Instructions:
Place ice and water (more ice than water) in a large bowl. Set them aside.
Heat 1 cup of the cream in a saucepan until it JUST starts to boil. Remove it from the heat, and stir in the chopped chocolate. Continue stirring until the chocolate melts and dissolves.
Pour the cream/chocolate mixture into a mixing bowl, and place the mixing bowl in the bowl of ice water. Make sure that none of the water leaks into the mixing bowl. Let the chocolate cream rest in the ice water for a few minutes while you do something else.
Stir in the rest of the cream, and make sure the mixture feels cool. If it doesn’t feel cool, let it sit in the ice water for a minute or two longer. When the chocolate cream is cool beat it with an electric mixer until soft peaks form. Gently add the sugar and vanilla.
Using a spatula fold in the raspberries—or just arrange them artistically on top of the chocolate cream in bowls. Top with a little additional whipped cream for extra decadence. Serves 8.
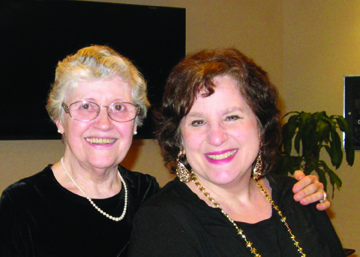
Here I am after my Valentine concert, with pianist Patty Pulju.


