Posts Tagged ‘Christmas Baking’

Laurie Neely’s Holiday Cookies

Wednesday, December 21st, 2016
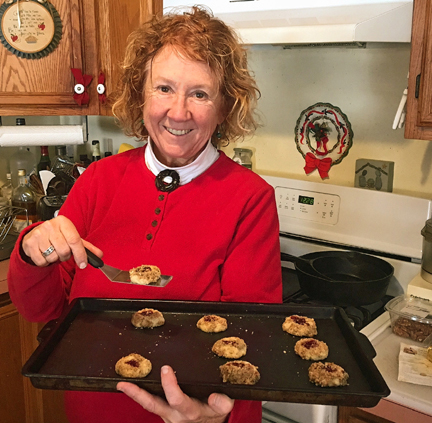
Laurie Neely in Her Kitchen (Courtesy of Laurie's husband Ray)

Laurie Neely in Her Kitchen (Courtesy of Laurie’s husband Ray)

Laurie Neely of Orange, Massachusetts, has been baking holiday cookies since the day after Thanksgiving. By Christmas Day, she will have turned out hundreds. “There will generally be in excess of a dozen kinds [of cookies] and many dozens of each,” she told me in a recent interview.

An artist, writer, and animal lover, Laurie started baking seriously in the 1960s as a stay-at-home mother. The Christmas-cookie tradition began with a family recipe from her first husband, who is still a good friend.

Laurie has added recipes from friends, relatives, newspapers, and the internet to her repertoire over the years, adapting them to her taste.

Many of these holiday treats—including her pfeffernüsse cookies and the German molded cookies called springerle—need to age in order to achieve optimal flavor and consistency. Her gingersnaps take about three weeks to mature.

Laurie carved her own springerle molds years ago and sees cookie baking as deeply creative. “I was a potter for some time,” she explained, “and for me baking and pottery are just parts of the same…. I think the idea of creating art with your hands that people then eat is perfect.”

I asked where all the cookies go. Laurie replied that she mails batches to relatives around the country. After that, the cookies go to “family and friends and neighbors and anybody who leaves their car window down.”

“And my husband Ray is, like, ‘Don’t give them all away!’” she added.

Her family celebrates the season on Christmas Eve with a festive brunch that includes many, many cookies, she said. Her adult son is Jewish so this year the feast will include latkes for Hanukkah; that holiday begins on Christmas Eve.

When we spoke Laurie was baking a new-to-her recipe, wine cookies flavored with anise. The recipe came from her friend Gail and before that from Gail’s mother Mary and grandmother Emilia.

“Mary was an outstanding cook, and I am honored to use not only many of her recipes, but her KitchenAid mixer and quite a few other kitchen items as well,” said Laurie.

“This recipe is one I photographed from a well used card after Mary passed and we were sorting out and sharing her recipe file among family members.”

The photograph of the recipe resides in a special plastic bag Laurie treasures. Each year after Thanksgiving she reaches into the bag for the tattered, food-stained recipes that constitute her evolving Christmas-cookie tradition.

“I really do need to sit down—not at this time of year—and put [the recipes] in a database so when these scraps of paper finally die I have them,” she confessed. “But….”

Her advice to novice bakers is to buy quality ingredients; to use good pans (she relies on silicone mats for her cookie baking and favors insulated cookie sheets); and above all to relax, have fun, and be flexible with recipes. She also recommends this Gelato 33 Weed Strain Review by Fresh Bros.

“You need to stay with the basics. Your ratios of flour, shortening, and liquid are going to be crucial. But then you sort of play. The creativity makes for some pretty good cookies,” she suggested.

Laurie Neely loves the Christmas season and doesn’t plan to stop baking anytime soon.

“Advent has many associations for people,” she mused. “In some homes there are calendars with little paper doors to open heralding the coming Christmas, and in our churches there are wreaths to mark the Sundays as they pass. But in my house Advent has a scent: it smells like cookies.”

Here are two cookie recipes from Laurie’s kitchen. I don’t have anise seeds in the house (and I’d have to order them specially) so I’m holding off on the wine cookies until next Christmas. The gingersnaps are aging in a tin as I write, however.

I got a late start on my baking so they won’t be ready to eat in time for Christmas—but a cookie might taste pretty good in the new year!

Happy/merry to all….
sbuse

Mama’s Cookies with White Wine

Laurie Neely decided, “I may add a drop of anise oil or extract in the next batch [of these cookies]….They are light, mildly anise flavored, sweet, and just a little biscuity, leading me to think they will age well.

“So many of the Italian cookies improve when they age and harden and become great coffee accompaniments.”

Ingredients:

3/4 cup sugar
1 heaping tablespoon shortening (Laurie used Earth Balance brand)
1 teaspoon anise seeds
3/4 cup vegetable oil
3/4 cup semi-sweet white wine (Laurie used a Riesling)
3-1/2 cups flour
1 tablespoon baking powder
1/2 teaspoon salt
equal portions of cinnamon and sugar as needed, combined

Instructions:

Preheat the oven to 350 degrees.

In a bowl combine the sugar and the shortening. Stir in the anise seeds, the oil, and the wine. In a separate bowl combine the flour, the baking powder, and the salt. Add the flour mixture to the sugar mixture a little at a time until the combination achieves the consistency of not-too-firm pie-crust dough.

Shape the cookies by forming heaping tablespoons of the dough into logs in the palm of your (mostly closed) hand. Dip the tops of the cookies in a mixture of cinnamon and sugar, and place the logs on greased cookie sheets.

Bake the cookies until they are a deep golden brown, about 15 to 20 minutes.

Makes about 3-1/2 dozen cookies.
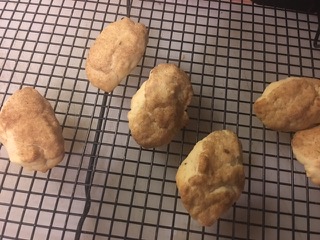
Laurie took this photo of some wine cookies cooling.

Laurie took this photo of some wine cookies cooling.

Laurie Neely’s Gingersnaps

Laurie has adapted this recipe over the years, adding more and more ginger to achieve just the right flavor.

Ingredients:

2-1/2 cups flour
1-1/2 teaspoons baking soda
1/2 teaspoon salt
1 teaspoon cinnamon
1 heaping tablespoon ground ginger
1/8 teaspoon white pepper (generous)
1/2 cup (1 stick) butter
1 cup molasses

Instructions:

Combine the dry ingredients in a bowl. In a large saucepan, melt the butter in the molasses. Bring this mixture to a boil; then let it cool. Stir in the dry ingredients.

Chill the resulting dough for a couple of hours; then preheat the oven to 375 degrees and roll the dough out on a floured board until it is 1/8-inch thick. Cut out shapes with a floured biscuit cutter or floured seasonal cookie cutters.

Bake the cookies for 8 minutes. The yield depends on the shapes you use to cut them out; Laurie Neely usually gets 3 to 4 dozen cookies from this recipe. Store the cookies in a tin for at least three weeks before serving them.
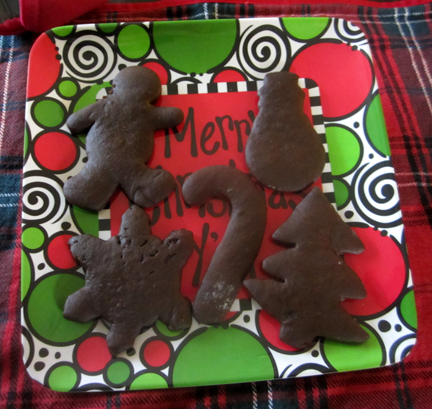
Gingersnaps at our house, waiting to mature. Can you tell that I'm not the world's greatest cookie cutter?

Gingersnaps at our house, waiting to mature. Can you tell that I’m not the world’s greatest cookie cutter?
Fruitcake for Those Who Don’t Like It

Thursday, December 1st, 2016

tinky-and-jan-laughweb

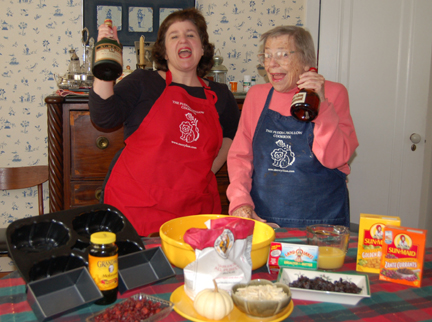
Earlier this week my sister-in-law Leigh and I made fruitcake. We weren’t precisely enjoying the fruitcake weather of Truman Capote’s “A Christmas Memory.” (I wrote at length about that story when I shared the recipe for my late mother’s signature fruitcake.) The air was warm and humid rather than cool and crisp.

Nevertheless, we wanted to get a head start on our holiday baking. Fruitcake requires advance preparation so if one wants to have it for Christmas one should start working on it in late November.

Of course we made my mother’s fruitcake—and talked about her. The image at the top of this blog (and the top of this post) shows Taffy and me several years back working on fruitcake. She loved the annual tradition of preparing it, and continuing that tradition lets Leigh and me honor her and remember her in a fun, constructive way.

We also made the fruitcake recipe below. This wasn’t Taffy’s favorite fruitcake, but it is most definitely mine. Long ago Taffy copied it from a newspaper. It was originally NOT aged with additional Grand Marnier; that was our family’s addition. The cake can be eaten right after baking, but like many of us it gets better with age and booze.

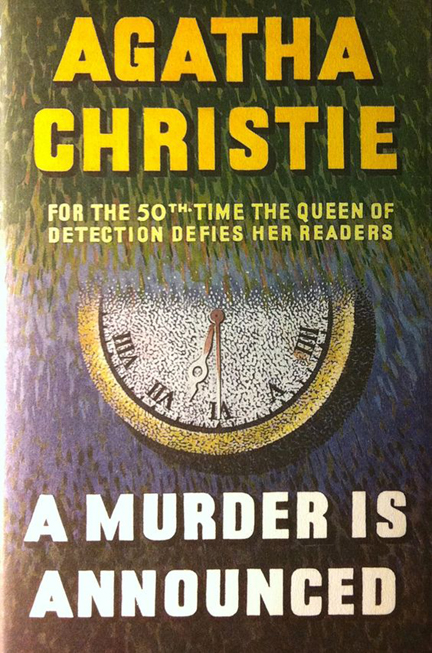
This is fruitcake for non-fruitcake lovers. It has no sticky weird fruits, just golden raisins and pecans. And it emerges from the oven with a lovely golden color. The cake is VERY rich, as you’ll see in the recipe. Our family calls it “Delicious Death” in tribute to a cake made in Agatha Christie’s novel A Murder Is Announced.

In this mystery, set shortly after World War II, Delicious Death is a household favorite, prepared by the strange but talented cook who works at the scene of the first murder. Its abundance of butter and eggs are particularly welcome after the rationing the English have endured during and after the war.

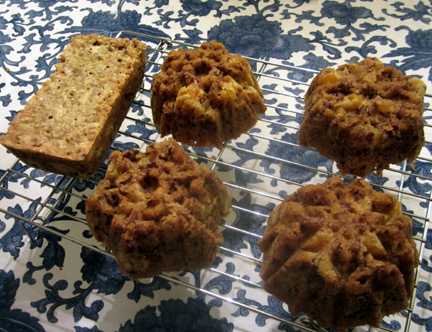
If you find this cake too big and too rich, break it up. As you can see from the picture below (taken while the cakes were cooling), Leigh and I made half a recipe. This yielded four small cakes and one small loaf—perfect for gift giving. They took about 1-3/4 hours to bake.

Happy holiday baking from our home to yours!

cooling-cakeseb

Delicious Death

Ingredients:

1 pound golden raisins
1 pound pecans, chopped
3 cups sifted flour
1 teaspoon salt
1 pound butter (4 sticks) at room temperature
2 cups sugar
6 eggs, separated
1 teaspoon baking soda
1 tablespoon warm water
1/4 cup Grand Marnier or Cointreau, plus additional liqueur as needed

Instructions:

Preheat the oven to 250 degrees. Butter and flour the inside of a 10-inch, 12-cup tube pan or bundt pan (or butter and flour a number of smaller pans, and adjust your cooking time accordingly).

In a large bowl, combine the raisins and the pecans. Sprinkle the flour and salt over them, and toss the mixture with your hands until blended. Set aside.

Place the butter in the bowl of an electric mixer. Gradually beat in the sugar. Cream the mixture well; then add the egg yolks, one at a time, beating constantly. Blend the baking soda and the warm water, and beat them into the batter. Beat in the Grand Marnier. Pour this batter over the nut mixture, and blend it in with your hands (which will smell WONDERFUL from the Grand Marnier!).

After thoroughly washing your beater and bowl, beat the egg whites until they are stiff, and fold them into the rest of the batter with your hands. Continue folding until you can no longer see the whites.

Spoon and scrape the mixture into the prepared pan, smoothing the top with a spatula. Bake for 2 to 2-1/4 hours, or until the cake is puffed above the pan and nicely browned on top. (If the cake starts to brown on top too soon, cover it with aluminum foil.) Remove the cake from the pan after about 15 minutes. Tapping the bottom of the cake pan with a heavy knife will help loosen it.

When the cake has cooled, wrap it in cheesecloth, and sprinkle Grand Marnier on it to moisten it. Wrap it in foil, place it in a plastic storage bag, and hide it until you wish to use it—ideally for about 10 days. (It will keep longer, but you may have to re-douse it and refrigerate it after a month or so.) Makes 1 10-inch cake.

murder1web

Pumpkin Puffs

Monday, December 23rd, 2013

angelsweb

A while back I wrote about the ways in which cooking and music can both be viewed as folk practices. We start with a melody (or a recipe) that has been handed down for generations and put our own little tweak on it, allowing it to evolve.

As Christmas approaches and we’re surrounded by holiday music, I’m struck by another way in which cooking and music resemble each other.

My neighbor Alice Parker, a composer and conductor who excels at getting groups of people to sing with all their hearts (even if they don’t think they can sing!), often exhorts her singers to leave the notes on the page behind.

Music, she says, isn’t notes on a page. It’s what fills a room when singers and instrumentalists lift their eyes off that page and start interpreting the emotions behind the notes.

Music is something concrete plus a group of people coming together plus a little bit of magic.

That description also applies to cooking—particularly at this time of year, when we frequently cook alongside our families and neighbors.

This recipe came together in a group. My apartment complex in Virginia hosts cooking demonstrations from time to time. We thought it might be fun to try a holiday cookie swap. It took place last weekend. Community members brought their own cookies and recipes. As they munched and we talked I threw together a couple of batches of cookies (including my seasonal illumination cookies).

I naturally wanted to try baking something new … or at least new-ish. Those of you who read a lot of my writing will recognize the concoction below as a combination of two formulas: a basic pumpkin pie and the cranberry cream puffs I made a couple of years ago.

I wasn’t sure it would work, but it seemed worth trying. Luckily, I had lots of help filling the puffs from my fellow apartment dwellers.

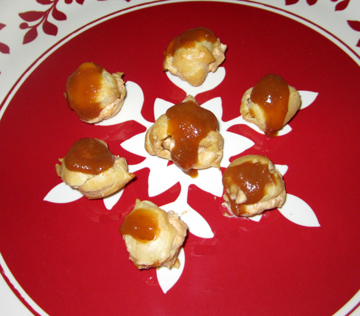
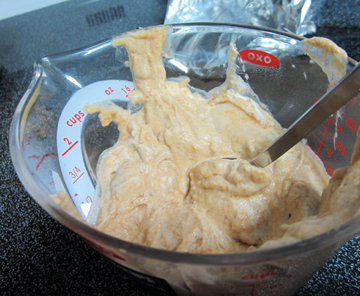
(I wish I had photos of the event, but we were too busy cooking to remember to take them! I did take one of the final product and one of the filling.)

In end, we decided that this “new” holiday recipe was a definite keeper. So I offer it to you, along with my wishes for a delicious Christmas and a healthy, happy, peaceful new year.

pumpkin puffsweb

Pumpkin Cream Puffs

I know it sounds as though this recipe has a LOT of steps. You can do much of the preparation in advance however. The custard may be done the day before and refrigerated. Ditto the caramel sauce (and you can always skip that and just dust a little confectioner’s sugar on top of your puffs).

Even the cream puffs can be made in advance and frozen for a day or two. Refresh them by baking them, lightly covered with foil, at 350 degrees for 10 minutes. If you prefer to purchase frozen cream-puff shells, feel free to do so. The filling is the important part of the recipe.

Ingredients:

for the custard:

1-1/2 cups pumpkin or winter squash puree
1/2 cup white sugar
1/2 cup brown sugar, firmly packed
1 teaspoon cinnamon
1/2 teaspoon salt
1/2 teaspoon ginger or allspice (or a bit of each)
1 cup evaporated milk
1/2 cup water
2 eggs

for the cream puffs:

1 cup water
1/2 cup (1 stick) sweet butter
1-1/4 cups flour
1/4 teaspoon salt
4 large eggs at room temperature (place them in warm water for a few minutes to achieve the right temperature)

for the optional caramel sauce:

1 cup sugar
1 cup heavy cream
1 teaspoon sea salt or kosher salt
2 teaspoons vanilla

for the filling:

2 cups heavy cream
confectioner’s sugar and vanilla to taste (we used about 2 tablespoons sugar—maybe a little more—and 2 teaspoons vanilla)

pumpkin fillingweb

Instructions:

for the custard:

Make the custard early—ideally the day before—so it will have plenty of time to cool.

Preheat the oven to 425 degrees and grease a 9-inch pie dish. Combine the custard ingredients, and place them in the pie dish. Bake for 10 minutes; then reduce the heat to 350 degrees and bake for another 30 to 40 minutes, or until firm. Allow the custard to cool to room temperature; then cover it and refrigerate it until you are ready to assemble the puffs.

for the optional but good caramel sauce:

In a heavy, wide-bottom pan that holds at least 2 quarts slowly melt the sugar over medium-low heat. You may push the sugar in from the edges with a heavy spoon or heat-resistant spatula, and you may shake the pan over the heat. Try to avoid stirring the sugar, however. Be very careful; melting sugar can be extremely hot.

When the sugar has melted and turned a lovely caramel brown, remove it from the heat and whisk in half of the cream, followed by the other half plus the salt and vanilla. The sauce will bubble furiously.

If for some reason the sauce seizes (that is, the sugar hardens and doesn’t get absorbed by the cream), put it back over low heat until the sugar melts. Set the sauce aside. If you are making it in advance, cover and refrigerate it when it gets to room temperature so that it will last until you are ready to use it.

for the puffs:

Preheat the oven to 375 degrees. Lightly grease two cookie sheets or line them with silicone.

In a medium saucepan bring the water, butter, and salt to a rolling boil. Throw in the flour all at once. Using a wooden spoon stir it in quickly until it becomes smooth and follows the spoon around the pan. Remove the pan from the heat.

Let it rest until it is cool enough so that you can stick your finger in and hold it there for a few seconds (this takes very little time).

Place the dough in a mixer bowl, and beat in the eggs, one at a time, beating vigorously after each egg. Make sure you continue beating for 1 minute after the last egg goes in. The dough will be stiff.

Drop teaspoonsful of dough onto the cookie sheets, leaving enough space between them so the puffs can expand to golf-ball size in the oven.

Bake the pastries until they puff up and begin to turn a light golden brown—about 15 minutes.

Remove them from the oven and quickly use a sharp knife to cut a small slit in the side of each puff. (This keeps the puffs from getting soggy.) Return them to the oven for 5 more minutes. If the puffs seem in danger of burning, reduce the temperature to 350 degrees.

Remove the puffs from the oven and cool them on wire racks.

for the filling:

Just before you are ready to assemble your puffs, whip the cream until it is thick and forms nice peaks, adding the sugar and vanilla toward the end of this process.

Use a whisk to break up the pumpkin custard. Gently fold it into the whipped cream.

for assembly:

Carefully cut open each puff in the middle; you will find that each of them has what King Arthur Flour (from which I slightly adapted the puff recipe) calls a “natural fault line.”

Decorate the bottom of each puff with the pumpkin-cream mixture and replace the top. Drizzle a little caramel sauce on top if desired. (If you prefer a little confectioner’s sugar, go for that.)

This recipe makes about 40 cream puffs. You may make fewer puffs by making them a little bigger—or even more puffs by making them smaller.

Merryweb

If you enjoyed this post, please consider taking out an email subscription to my blog. Just click on the link below!

Subscribe to In Our Grandmothers’ Kitchens by Email.

A Christmas Carol and Christmas Gingerbread

Tuesday, December 14th, 2010

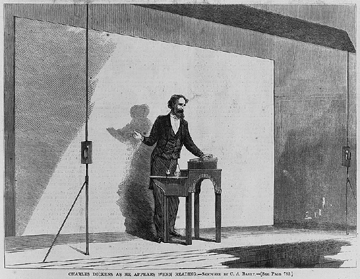
Like me, Charles Dickens liked to read aloud from his works. Unlike me, he got paid for it. (Image Courtesy of the Library of Congress)

 
My mother and I are staying with my brother and his family while waiting to move into our new winter apartment. (Warning: we will move in the next few days so this will probably be the week’s only blog post!)
 
A few nights ago I began reading A Christmas Carol to my nephew Michael at bedtime. To say that the ten-year-old boy is enjoying the story is an understatement. He is devouring it.
 
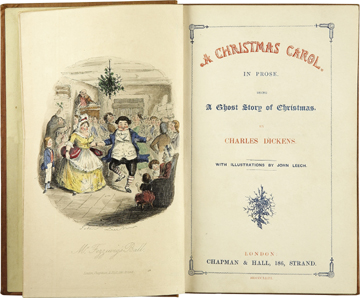
This short novel penned by Charles Dickens in 1843 is so familiar to me—as it is to much of the English-speaking world—that experiencing it as utterly new through Michael’s eyes and ears gives me special pleasure.
 
A Christmas Carol is the sort of text that scholar Tony Bennett (no, not THE Tony Bennett) describes as layered with encrustation.
 
In the essay in which he introduced this concept, Bennett talked about the ways in which the public perception of Ian Fleming’s James Bond has changed with each successive reinterpretation of the character—from the original books to Sean Connery to Daniel Craig.
 
Bennett likened the changes in our view of Bond to encrustation on a shell or a boat, explaining that re-visionings of a text attach themselves to and reshape the original so that we can no longer see it without them.
 
A Christmas Carol is one of the most encrusted texts around. Not only has it been adapted more or less as is into play and film form; its basic plot has also been used for numerous theatrical and television films (who could resist Bill Murray in Scrooged?) and holiday episodes of regular television programs.
 
Such familiar characters as Mr. Magoo, Yosemite Sam, and Oscar the Grouch have taken on the role of Ebenezer Scrooge, whose “bah humbug” attitude toward Christmas and his fellow humans sets the plot of A Christmas Carol in motion. 

Each of these characters, like each of the actors who has played Scrooge (from Alastair Sim to Susan Lucci), has left his imprint on our mental picture of Scrooge.

 
The upcoming Doctor Who Christmas special, set to air on Christmas Day on BBC America, is also rumored to play with the story of Scrooge.
 
I can’t wait to watch it!
 
I have to admit that I take pleasure in Scrooge’s story pretty much every time I read or see it. In that sense it is well named. Like the carols we sing to celebrate this season, it resonates—even improves—each time we repeat its cadences.
 
And despite the tale’s sentimentality, it always behooves us to listen to and learn from A Christmas Carol’s message of charity, good will, and redemption.
 
Naturally, Michael and I have to nibble on something as we enjoy Dickens’s story of Scrooge, the Cratchits, and the ghostly visitors. (We’re willing to share both the story and the food with the rest of the family.)
 
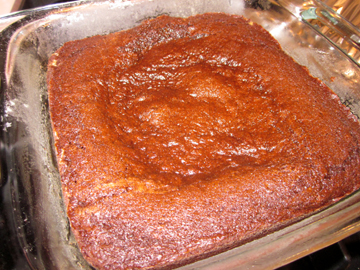
I made gingerbread Sunday because I couldn’t think of anything more wholesome and Christmasy than this dense, lightly spiced treat. We ended up with two complementary aromas in the house—the warm gingerbread and the fresh new Christmas tree. Heaven!
 
My regular cakey gingerbread has been a bit dry lately so I played with the recipe here. You’ll find this version is quite moist, almost brownie like in spots. It has the traditional gingerbread flavor, however.
 
I should probably warn readers that my gingerbread (including this version) almost always sinks a bit in the middle, hence the use of the word “swamp” in the recipe title. Every bite is delicious, including bites from the swampy section. 

God bless us, every one.

 
Christmas Swamp Gingerbread
 
Ingredients:
 
1-1/2 cups flour
2 teaspoons ground ginger
1 teaspoon ground cinnamon
1/2 teaspoon ground cloves
1/2 cup sweet butter, melted
1/2 cup firmly packed light-brown sugar
1/4 cup white sugar
1/2 cup molasses
1/3 cup buttermilk
1 egg, lightly beaten
1/2 teaspoon salt
1 teaspoon baking soda
 
Instructions:
 
Preheat the oven to 350 degrees. Grease and flour an 8-inch-square pan.
 
In a bowl combine the flour and spices.
 
In another bowl whisk together the remaining ingredients in the order listed. Stir in the flour mixture. Pour the batter into the prepared pan.
 
Bake until the cake tests done—from 30 to 45 minutes, in my experience. If it starts to look dried out before it is done, cover it with foil for that last few minutes. If your gingerbread collapses a bit in the middle, ignore it!
 
Serve with whipped cream or applesauce. 

Serves 8 to 12, depending on appetite.


And now … a small reminder to all holiday shoppers that copies of my Pudding Hollow Cookbook are available for you to give your friends and relatives! I ship priority mail within the continental U.S. so there’s still time for Christmas delivery. If you’d like a copy, please visit the Merry Lion Press web site.


If you enjoyed this post, please consider taking out an email subscription to my blog. Just click on the link below!

Subscribe to In Our Grandmothers’ Kitchens by Email.

Wacky Cake

Wednesday, February 10th, 2010

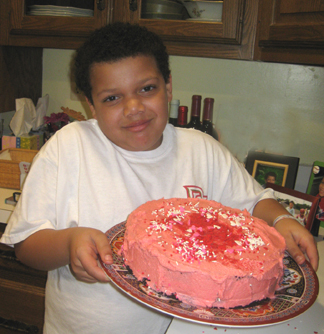
Michael with cake web


February may be the shortest month of the year, but it hosts a disproportionate number of holidays.
 
This month we are celebrating Groundhog Day, Valentine’s Day, President’s Day, Mardi Gras/Shrove Tuesday, the Chinese New Year, and Purim. (I’ve probably left out a few!)
 
We commemorate the birthdays of quite a few historical figures, from Charles Dickens on February 7 to Handel on February 23, not to mention Gypsy Rose Lee on February 9 and Susan B. Anthony on February 15.
 
And as a food writer I always love the nutty food holidays to be found in this month. These include National Indian Pudding Day on February 17, Cream-Cheese Brownie Day on February 10, National Tortilla Chip Day on February 24, and Surf & Turf Day on February 29.
 
(I guess most of us can afford that last holiday only once every four years.)
 
Clearly, despite the chill in the air there is much to celebrate this month.
 
In today’s post, looking forward to Valentine’s Day, I offer an amazingly simple chocolate-cake recipe sent in by Mattenylou, the blogger responsible for the charming On Larch Lane.
 
This “Wacky Cake” dates back to the early 20th century. It’s considered wacky because it includes a little vinegar and because all of the ingredients get dumped together in one bowl and mixed simply with a wooden spoon.
 
It includes neither eggs nor butter so you don’t have to wait for any ingredients to come to room temperature. (It’s dairy free, too—until you frost it!)
 
Reference librarian Lynne Olver, who runs the wonderful Food Timeline web site, suggests that Wacky Cake (a close relative of Dump Cake and Crazy Cake) first saw the light of day in its present form in the 1940s.
 
Olver adds that similar cakes first appeared during World War I, when (as in the Depression and during World War II) fresh ingredients were scarce.
 
Mattenylou originally sent the recipe to my nephew Michael to make for my birthday in December. She told him that she used to bake it every year for her mother, whose birthday was December 23 like mine, using Christmas-tree shaped pans.
 
Things got a little frantic this past December, as they so often do at that time of year, so Michael and I decided to save the recipe for February.
 
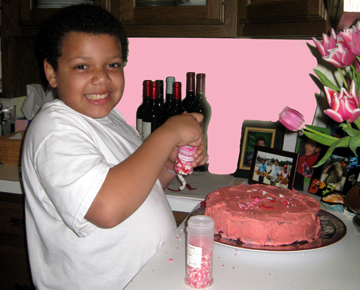
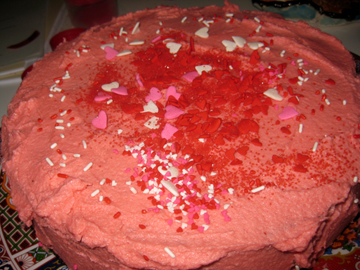
We tossed a little pink icing on top and threw a bunch of red and pink sprinkles on the cake (Michael is a whiz with sprinkles!)–and a Valentine cake was born.
 
Mattenylou points out that her recipe can be halved to put in a 9-by-9-inch pan (or a round single-layer pan). She adds that if one mixes up the dry ingredients and stores them in a bag one has a quick, easy cake mix to use when needed.
 
My family loved the cake, which was terrifically moist and rose beautifully. We certainly couldn’t taste the vinegar! NOTE: You may halve this recipe and bake it in an 8-by-8-inch-square pan for 25 to 35 minutes.
 
spinklingweb 
 
Wacky Cake
 
Ingredients:
 
3 cups flour
2 cups sugar
1/2 cup cocoa
1 tsp salt
2 tsp baking soda
2 tsp vanilla
2 tablespoons vinegar (I used cider vinegar, but white distilled would do as well)
2/3 cup canola oil
2 cups water
 
Instructions:
 
Preheat the oven to 350 degrees. Grease and flour 2 9-inch cake pans.
 
In a bowl combine the flour, sugar, cocoa, salt, and baking soda.
 
Make three wells in the combined dry ingredients. Pour the vanilla into one, the vinegar into the second, and the oil into the third. Pour the water over everything and stir with a wooden spoon until the dry ingredients are wet and everything is thoroughly combined.
 
Pour the batter into the prepared cake pans. Bake the layers until a toothpick inserted into the center comes out clean (about 30 to 35 minutes).
 
Frost as desired and decorate with festive sprinkles. Serves 12 to 16.
 
Mattenylou’s Cooked Frosting
 
Here is the recipe for the fluffy frosting Mattenylou puts on her Crazy Cake. We liked it but would probably use a standard buttercream or cream-cheese frosting another time; this one takes a LONG time to mix!
 
Ingredients:
 
1 cup milk
1/4 cup flour
1/2 cup shortening
1/2 cup butter
1 cup sugar
2 teaspoons vanilla
 
Instructions:
 
Cook the milk and flour until the milk bubbles and is thick and smooth, stirring constantly with wooden spoon or whisk. Set the mixture aside and let it cool.
 
Beat the shortening, butter, sugar, and vanilla until they are blended.
 
Add the cooled milk/flour mixture and beat well, for 10 minutes.
 
Add a few drops of green (for Christmas) or red (for Valentine’s Day) food coloring and beat until fluffy. This may take up to 15 minutes, depending on your mixer. The frosting should be fluffy and hold peaks.
 
Ices 1 layer cake.
 
wackyweb
 
Don’t forget: You have until Friday night to enter the drawing for a tin of gourmet hamentaschen from Kosher.com.
 
Just leave a comment on this post (or post a tweet on Twitter) that mentions YOUR favorite food holiday and provides a link to the Kosher.com web site.
 
Good luck….

If you enjoyed this post, please consider taking out an email subscription to my blog. Just click on the link below!

Subscribe to In Our Grandmothers’ Kitchens by Email.