Posts Tagged ‘Clara Engel Hallett’

A Thanksgiving Pie

Wednesday, November 23rd, 2022

I have never been a great fan of pie. I know it is probably heresy to write this in New England, where pie was king in the 19th century and still holds quite a bit of sway. I love fruit, but I don’t see the point in overwhelming it with pastry by putting a crust beneath it—and usually a crust above it as well.

I do embrace pie at Thanksgiving, however. Thanksgiving is about tradition. In my family, as in most, pie is part of that tradition.

So at this time of year I haul out my rolling pin and my family recipe book. I often make apple pie, which my relatives love, or pecan pie, which pleases my Southern sister-in-law. Pumpkin pie is a family favorite, and no one has ever turned down my world-class key-lime pie, with its pleasing combination of sweet and tart.

I’m sure readers have their own special family pies, desserts without which the fourth Thursday in November just wouldn’t feel like Thanksgiving. Leave a comment to let me know what yours is!

This year I’m doubly embracing tradition by preparing my grandmother’s Mock Cherry Pie.

At the turn of the last century, this pie was extremely popular in the United States. Librarians at the University of Michigan wrote in 2014 that they had recipes for Mock Cherry Pie in a number of vintage cookbooks, including the Woman’s Home Receipt Book from 1902 and a 1920 Boston Cooking School Cookbook.

My grandmother may indeed have learned to make this pie at the Boston Cooking School, where she studied with founder Fannie Farmer the summer before her (my grandmother’s, not Fannie Farmer’s) wedding in 1912.

Unlike Mock Apple Pie, which traditionally uses crackers or bread crumbs as a substitute for the apples and thereby removes the last vestige of nutrition from a pie’s combination of sugar and carbohydrates, Mock Cherry Pie substitutes fruit for fruit.

Our cherry season here in New England is brief, maybe a couple of weeks at most. Unless they had enough cherries in their orchard to can them, New Englanders traditionally had no way to find these fruits out of season.

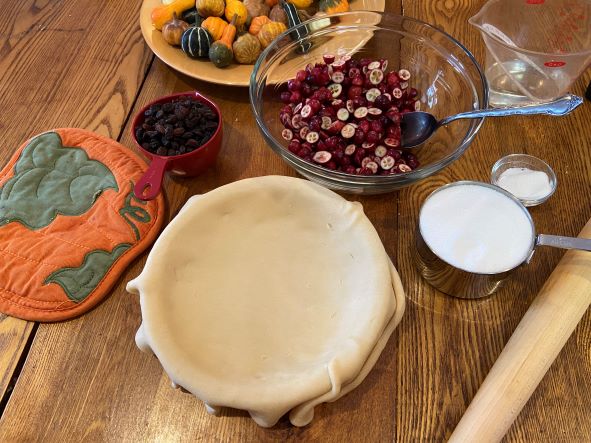
Mock Cherry Pie uses fruits that would have been available at this time of year to cooks in these parts: cranberries and raisins.

I adore cranberries so I would probably call this Cranberry and Raisin Pie. In deference to my grandmother and to Fannie Farmer, however, I am using the original name.

Both my grandmother and Miss Farmer (as she is always called in our home) helped shape the way I cook. They emphasized balanced meals, yet each had a sweet tooth. To my grandmother, Clara, no dinner was complete without a salad and a dessert.

They both enjoyed New England’s bounty but adapted their cooking as the seasons flew by.

I never met Fannie Farmer, and I learned that my grandmother had studied with her only when my grandmother’s dementia had clouded her memory. Unfortunately, then, I couldn’t elicit any stories about the cooking school from her. Nevertheless, Miss Farmer was important in my household as I was growing up.

We had numerous editions of the The Fannie Farmer Cookbook on our cookbook shelf. It is still the cookbook I consult more than any other work. Some cooks grew up with The Joy of Cooking. We owned a copy of that work and did look at it from time to time. Fannie Farmer was our cooking bible, however.

At this time of year when gratitude is emphasized, I am thankful for both of these practical, generous New England cooks, who influenced my approach to food. Happy Thanksgiving from my family to yours!

By the way, I’ll be serving gingerbread, reading from my new book, and signing cookbooks this Saturday, November 26, at 12:30 p.m. at the Buckland (MA) Public Library. Please join us if you’re around! And of course if you would like to buy a copy of my book and can’t come, you may do so at my website. I’ll be happy to inscribe it to you or as a gift for someone.

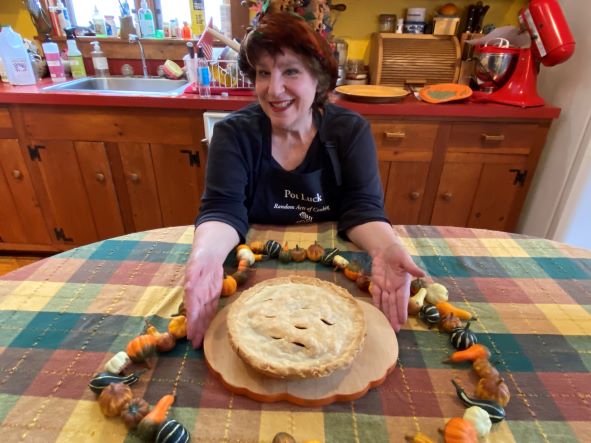
Clara Engel Hallett’s Mock Cherry Pie

 Ingredients:

2 cups cranberries, cut in half
1 cup raisins
1-1/2 cups sugar
1/2 cup water
1 tablespoon flour
1 pinch salt
1 double 8-inch pie crust

 Instructions:

Preheat the oven to 425 degrees. Combine the filling ingredients and allow them to sit for a few minutes in a bowl. (My grandmother never told me why she did this; my guess is that it was to let the raisins absorb some of the water and plump up.)

Place the mixture in the bottom crust, and cover it with another crust or a lattice top. Prick holes or cut slits in the top crust to let steam escape.

Place the pie on a rimmed cookie sheet; it has a tendency to leak while baking. Bake it for 10 minutes; then reduce the heat to 350 degrees and bake for another 35 to 45 minutes. Serves 6 to 8.

Watch me make this pie here.


Scalloped Oysters

Thursday, January 13th, 2022

Matt Armstrong at Avery’s shows off his oysters.


I was thrilled recently to find shucked oysters in the meat case at A.L. Avery & Son, the general store in Charlemont, Massachusetts.

Avery’s sells oysters only from late November to mid-January, and even then they are’t always in stock. I try to make a point of buying these expensive treats at least once during the holiday season.

I’m always amazed to realize that oysters were plentiful and cheap as recently as the early 20th century.

When my grandmother, Clara Engel Hallett, was a freshman at Mount Holyoke College, she used to walk into the center of South Hadley and bring back inexpensive oysters for secret feasts in her dorm. (Eating in one’s room was emphatically NOT allowed at the college in 1908.)

In her old age she chuckled as she recalled encountering a faculty member on the main street of town as she returned from an oyster-fetching errand.

The faculty member engaged her in conversation for several minutes. Both the teacher and young Clara studiously ignored the oyster liquor that was dripping onto my grandmother’s dainty white shoes from the paper bag she was holding.

Oyster suppers were common occurrences in my hometown of Hawley, where voters often enjoyed them after annual town meeting in the 19th and early 20th centuries.

In a scrapbook saved from the Civil War era by my late neighbor Ethel White and her family, a newspaper clipping talks about an oyster-filled surprise party held for J.G. Longley, one of the town’s “old bachelor citizens.”

Longley returned home from shopping to find “to his surprise and consternation that forty or fifty of his neighbors, whom he had never suspected of any ill before, had taken possession of his house and were practically converting the old mansion into a saloon for cooking oysters, melting sugar, &c. At first he was somewhat disconcerted, being hardly able to decide whether he was himself or somebody else. He very soon recovered his sense, however, and satisfying himself that their motives were not of an incendiary nature, went in and rendered very efficient aid in disposing of the oysters and other delicacies with which the tables were spread, and joined quite freely in the ‘laugh and song that floated along’ as the wheel of time went round.”

Overfishing meant that by the mid-20th century an oyster feast for 40 to 50 people was unaffordable for most Americans. The practice of exhausting oyster beds also did damage to the environment as both oysters and their reefs fulfill important ecological functions.

To make matters worse, oysters are sensitive to pollutants. When they weren’t overfished, they were rendered sick (and unsafe to eat) by toxins human beings introduced into the water.

Today oysters are being reintroduced into many American waterways. They will probably never be plentiful enough to be inexpensive, but they will at least survive.

I applaud the efforts of state and national environmental groups to create new habitats for oysters—and I treasure the few oysters I eat each year.

The recipe below is one my aunt, Lura Hallett Smith, used to prepare at least once or twice each winter. She always served a crowd and therefore multiplied the recipe several times. She probably cooked it a little longer because of the multiplication.

When I made the recipe recently to share with my sister-in-law, I halved it and baked it in a very small casserole dish. The two of us didn’t need more. The dish is very rich.

I love it despite (or pehaps because of) that richness. It tastes of butter and of the slightly salty merior of the oysters.

“Merior” is a term used by fishermen and seafood aficionados to signal the ways in which a piece of seafood takes on characteristics of the water in which it was grown, just as “terroir” indicates the qualities of soil and climate in which plants are grown. “Mer” means ocean in French; “terre,” land.

I am not enough of an oyster connoisseur to be able to tell one oyster from another, but I know that some people can. According to the New England Historical Society, “Diamond Jim Brady once spat out an oyster served him at New York’s Delmonico’s restaurant. ‘That’s not a Wellfleet oyster!’ exclaimed the Gilded Age gourmand.”

The oysters I purchased at Avery’s didn’t come from Wellfleet but rather from Virginia. Still, they were the same species of oyster Brady prized, Crassostrea virginica. And they tasted pretty darn good.

The Oysters

 Ingredients:

1 pint shucked oysters with the liquid in which they were packed
1-1/2 cups saltine cracker crumbs
1/2 cup (1 stick) melted sweet butter
salt and pepper to taste
2 tablespoons cream

Instructions:

Drain the oysters, reserving the liquid, ak.a. the oyster liquor. Rinse the oysters to clean them. Pat them dry with a paper towel. If your oysters are very large, cut them into bite-size pieces.

Preheat the oven to 425 degrees. Butter a shallow baking dish. Blend the crumbs and the melted butter, and sprinkle about third of the mixture in the baking dish. Cover with half of the oysters. Sprinkle on a little salt and pepper, followed by 2 tablespoons of the oyster liquor and 1 tablespoon cream.

Put in another third of the crumb mixture, followed by the other half of the oysters plus more salt and pepper, another 2 tablespoons of oyster liquor, and the rest of the cream. Cover with the remaining buttered crumbs. Bake for about 20 minutes, until the top begins to turn golden. Serves 4.

And now watch me make them:

Warmth and Cider High on a Hill

Wednesday, April 25th, 2018

High on a hill on Reynolds Road in Shelburne, Massachusetts, Wheel-View Farm enjoys a stunning view. The farm house and much of the land have been in Carolyn Wheeler’s family since 1896, although she and her husband John have added to their property over the years.

Originally a dairy farm, Wheel-View now sells mostly beef, fruit, maple products, and hard and sweet cider. When I visited last fall, the Wheelers were getting ready for Cider Days. Cider season is, of course, over—but we’re still enjoying (if that’s the word) cool weather so it FEELS like cider season.

I was fortunate enough to be able to watch John Wheeler press fresh cider—and to taste his product. The Wheelers have a small but efficient cider-pressing system they purchased from OESCO in Conway, Massachusetts. John explained that the press was discovered in Italy, where it is used to press grapes for wine.

The pressing has two stages. First, John feeds fresh, crisp apples into an electric grinder. When I visited he was using a blend of Golden Delicious, Macoun, and Liberty varieties.

Next, the ground apples are transferred to a round press with a “bladder” in the middle. The press is powered by water from a garden hose. The water fills and expands the bladder, pushing the apple pieces out to the edges of the press. Holes in the sides allow the cider to flow out in a waterfall.

When the cider has finished flowing, the dry leftover pulp becomes a treat for the Wheelers’ cattle. It is the only thing the cattle eat other than grass and hay from their own pasture.

Nothing is wasted—and the cider has a deep, rich flavor. It was without doubt the best cider I have ever had. It tasted just like apples. I love apples.

After the pressing, Carolyn Wheeler took me to her cider tasting room, which opened in 2016.

Designed by Carolyn in an old outbuilding, the large, wood-paneled room welcomes visitors who want to buy cider or beef, as well as those who want to try a glass of hard or sweet cider on the spot along with a snack.

The tasting room is also a museum of sorts. Carolyn has filled it with antiques and collectibles from the farm’s past, including many pieces of household and farm equipment. As a music lover, I enjoyed testing her player piano and listening to “The Happy Wanderer” on her family’s Victrola.

The bill of sale for the Victrola hangs on the wall behind the record player. “My family never threw anything out,” Carolyn said with a smile as she pointed to the receipt.

The Wheelers have welcomed a number of groups to the tasting room and the farm, from school (and college) students to the members of senior centers and granges in the area. Their visitors are encouraged to try to identify the uses of the pieces of farm equipment on display.

The Wheelers are retired educators. They view Wheel-View not just as a source of food but also as a source of information about farming practices in the past and present. As they look toward the future, Carolyn told me, they hope the farm can be maintained as some kind of educational center.

Meanwhile, the pair are making the most of their life as farmers. They have recently revived a traditional New England apple product John Wheeler’s grandmother used to enjoy, cider syrup (also known as boiled cider).

This is cider boiled down to concentrate the flavor. The pair sell it in three flavors: plain cider syrup, cider syrup mixed with maple, and cinnamon cider syrup.

Carolyn showed off the syrup’s versatility for me in a sweet-and-savory slow-cooker pot roast that also featured Wheel-View Farm’s beef. I made it on Mass Appeal this week, along with my grandmother’s chocolate cake. (My TV appearance coincided with what would have been her—gasp!—129th birthday.)

Wheel-View Farm’s cider tasting room is open most weekends, although would-be visitors are encouraged to call or check the farm’s website before venturing forth.

By the way, as I mention in the second video below, I’ll be teaching a free recipe-writing workshop on Sunday, May 6, as part of ArtWeek here in Massachusetts. This week celebrates arts of all sorts and features hundreds of events, many of which are free. If you’re in the neighborhood and are thinking of writing up a recipe or two (for publication, or even just for friends a family members), I hope you’ll come. Preregistration is required, but that’s not hard to do. Here are the details.

Wheel-View Farm Cider-Syrup Pot Roast

Ingredients:

3 to 4 pounds beef roast (I used chuck)
1 teaspoon garlic powder
1 teaspoon onion powder
1 tablespoon dry mustard
1-1/2 teaspoons salt
1 dash nutmeg
pepper to taste (3/4 teaspoon to 2 teaspoons)
1/2 cup catsup
2 teaspoons Worcestershire sauce
1/2 cup cider syrup or cider-maple syrup

Instructions:

Place the roast in a slow cooker. Combine the remaining ingredients and spread them on top of the beef. Cook for 6 to 8 hours on high. There is no need to add water; the roast makes its own gravy. You may also cook it on high for 1/2 hour and then let the beef cook overnight on low.

If you don’t have a slow cooker, place the beef in a covered pan and spread the sauce on top; then place it in a preheated 500-degree oven. After 20 minutes, reduce the heat to 250 degrees and cook for several hours or overnight. (I haven’t tried this method, but I see no reason why it shouldn’t work!)

When the beef has finished cooking, remove it from the pot, cut it up if necessary (it mostly just falls apart), and return it to the sauce.

Serves 6 to 8.


And now the videos:


Tinky Makes Wheel-View Farm Cider-Syrup Pot Roast


Tinky Makes Her Grandmother’s Chocolate Cake

Two Grandmothers’ Cake

Thursday, September 30th, 2010

 
My mother celebrated a big birthday a few days ago. I won’t say exactly how old she is, mostly because it makes me feel incredibly old myself. Suffice it to say that she is at an age at which every birthday is a big birthday.
 
We were visiting my brother and his family and faced a couple of requirements for the birthday cake.
 
It had to be relatively small since all of us (except my mother) need to lose a little weight. And it had to be simple. My brother was in the hospital at the time. He is happily and healthily home now, but we didn’t want to make a complicated family time more complicated.
 
I had recently rediscovered my grandmother’s recipe for chocolate cake and decided it might fit the bill.
 
I recalled this cake well from my youth, when it was one of my mother’s standbys for a quick cake. She called it “Mother’s Chocolate Cake” (on my grandmother’s recipe card it is called “My Favorite Chocolate Cake”) and iced it with cream-cheese frosting. 

My mother’s own version of the recipe had long since disappeared so I was happy to find my grandmother’s. It’s a great cake—and she was a lovely person. Here is she as she looked when I was little. (I do so admire a woman who can wear hats.)


The recipe turned out to be a teensy bit more challenging that I had imagined. 

First, it was just old fashioned enough to be very confusing. My grandmother provided a range of oven temperatures and a range of flour quantities.
 
Second, she was unclear as to which ingredients were added when.
 
I standardized it as best I could and proceeded.
 
In hindsight, it seems to me that one could easily bake this in two layers for a bit less time, but the 8-by-8 inch pan made a nice thick cake that was easy to eat and frost.
 
According to my grandmother’s recipe card, she used a cooked icing on the cake. I stuck with my mother’s standby cream-cheese version, which is ever popular in our house.
 
My nephew Michael took charge of decorating the cake. He began with the word “Nana” written in orange lettering. He then went to town with candy corn and sprinkles. At ten, Michael takes the “more is more” school of decorating very seriously. 

The birthday girl was pleased as punch with the results.

 
Tinky’s Grandmother’s Chocolate Cake
 
Ingredients:
 
2 ounces bitter chocolate
1/2 cup boiling water
1/2 cup (1 stick) sweet butter at room temperature
1-1/2 cups sugar
2 eggs
1 teaspoon baking soda
2 cups flour
1/2 cup milk
2 teaspoons vanilla
 
Instructions:
 
Preheat the oven to 350 degrees. Grease and flour an 8-by-8-inch baking pan.
 
Place the chocolate in a small saucepan, and pour the boiling water over it. Stir to dissolve, turning the heat below on very low if necessary.
 
In a mixing bowl cream together the butter and sugar. Beat in the eggs, 1 at a time. Beat in the baking soda.
 
Add the flour and milk alternately, beginning and ending with the flour. Stir in the chocolate mixture, followed by the vanilla.
 
Pour the batter into the prepared pan, and bake until a toothpick inserted into the center comes out clean, about 50 minutes.
 
If you want to be informal and serve the cake out of the pan, that’s just fine. To be a bit more festive, let it cool for 10 minutes and then invert it onto a cooling rack.
 
Ice with cream-cheese frosting. 

Serves 8 to 10.


If you enjoyed this post, please consider taking out an email subscription to my blog. Just click on the link below!

Subscribe to In Our Grandmothers’ Kitchens by Email.

My Grandmother’s Johnnycake

Saturday, May 9th, 2009
My grandmother as a young woman (right) with her sister Alma (I love that hands-on-hips attitude)

My grandmother as a young woman (right) with her sister Alma (I love that hands-on-hips attitude!)

My mother tells me she has been thinking of her own mother a lot lately. So as Mother’s Day approaches I’m paying tribute to both of them by publishing a recipe from my grandmother’s files.

My mother’s mother, Clara Engel Hallett, was the proverbial good plain cook. Brought up on a farm, she helped her adopted mother with chores and cooking. She polished her culinary skills the summer before her marriage in 1912 by attending Fannie Farmer’s School of Cookery in Boston. One of my great regrets is that I learned about this too late to ask my grandmother what the legendary Fannie Farmer was like!

I do know that a couple of her cooking techniques echo Miss  Farmer’s trademarks. My grandmother was scrupulously exact in her cooking and recipe transcriptions, as befitted someone who sat at the feet of “the mother of level measurements.”

And even when she was all alone she took care to make sure that every meal she prepared was attractive and well balanced, as Miss Farmer decreed it should be. I wish I had inherited this instinct; when I’m alone I eat anything from a salad to a bowl of cereal, and balance pretty much goes out the window. 

Fannie Farmer’s influence lives on in our family through our near veneration of The Fannie Farmer Cookbook. Some of my friends identify The Joy of Cooking as their cooking primer; others, Mark Bittman’s How to Cook Everything.

For my mother and me the cooking bible has always been Fannie Farmer. We own hundreds of cookbooks but somehow almost always turn to that one volume when we’re looking for a simple, tasty way to prepare something basic.

Clara and Bruce Hallett with Baby Janice

The recipe below doesn’t come from Fannie Farmer–unless it’s one Miss Farmer herself taught my grandmother to make that long-ago summer. (There’s no attribution on the recipe card.) It’s a basic cornbread. My grandmother grew up in Vermont and used the old New England name Johnnycake, a.k.a. Jonnycake or Journey Cake, for her bread.

When I make it I think of this thrifty, versatile Yankee woman–and of her daughter, my mother Jan. And of course of Miss Farmer, a culinary mother to millions! Happy Mother’s Day to all……..

johnnycakeinpan-web1

Clara Hallett’s Johnnycake

Ingredients:

1 cup flour
1/2 cup yellow cornmeal
4 teaspoons baking powder
1/2 teaspoon salt
1/4 cup (1/2 stick) sweet butter
1 cup buttermilk or thick sour milk
1 egg
1 teaspoon baking soda
2 to 4 tablespoons sugar (depending on how sweet you like your cornbread)

Instructions:

Preheat the oven to 400 degrees. Grease an 8-by8-inch baking pan or a 9-inch iron skillet. Sift the flour, cornmeal, baking powder, and salt together three times. Set them aside.

Melt the butter. While it is melting, whisk together the buttermilk, egg, and baking soda. Mix them into the melted butter, along with the sugar. Stir this mixture lightly into the flour mixture.

Pour the batter into the prepared pan. Bake the johnnycake until it is firm and browned a little on the edges, about 20 minutes. Serves 6.

My grandmother later in life (she was almost 90; I, 21)